How Solar Panels Work with Portable Power Stations
A solar panel is a light-to-electricity converter. Sunlight hits the panel, electrons move, and your power station battery fills up. That is the elevator pitch. But between "sunlight hits the panel" and "battery is full," a chain of physics determines how fast you charge, how much energy you capture, and whether your setup is performing well or wasting half the available sunlight.
Understanding this chain — from photon absorption through charge controller processing to battery storage — lets you make better decisions about panel sizing, placement, and expectations. This guide walks through the entire process, explains the three major panel technologies, and gives you the practical knowledge to maximize charge speed in the field.
The Photovoltaic Effect: Sunlight to Electricity
Solar panels work because of the photovoltaic effect, discovered by Edmond Becquerel in 1839 and commercialized for power generation in the 1950s. The core mechanism is simple: when photons (light particles) strike certain semiconductor materials, they knock electrons loose from their atomic bonds. Those freed electrons create an electrical current.
Modern solar cells use silicon as the semiconductor. Silicon atoms are arranged in a crystal lattice, with each atom sharing electrons with its neighbors. When a photon with enough energy strikes a silicon atom, it dislodges an electron from the lattice. That electron becomes a "free carrier" — available to flow through an external circuit as electrical current.
To create a directional flow (rather than random electron movement), solar cells use a "p-n junction" — two layers of silicon doped with different impurities. The top layer (n-type) has extra electrons. The bottom layer (p-type) has "holes" where electrons are missing. The boundary between them creates an electric field that pushes freed electrons in one direction, generating direct current (DC) power.
A single silicon solar cell produces roughly 0.5 to 0.6 volts. To reach useful voltages, cells are wired in series inside a panel — 36 cells in series for a nominal 18V panel, 72 cells for 36V. The current (amps) depends on cell area and light intensity.
Panel Types: Monocrystalline, Polycrystalline, and Thin-Film
Monocrystalline Silicon
Monocrystalline panels use silicon cut from a single continuous crystal. The uniform crystal structure gives electrons a clear path, resulting in the highest efficiency of any mainstream panel technology — 20-23% for commercial panels, with lab records above 26%. You can identify monocrystalline cells by their dark black color and rounded corners (from the cylindrical crystal ingot they are cut from).
For portable power stations, monocrystalline is the dominant technology in 2026. Virtually every folding solar panel from EcoFlow, BLUETTI, Jackery, and Anker uses monocrystalline cells. The efficiency advantage means more watts per square foot, which means a physically smaller and lighter panel — critical when you are packing it for camping or travel.
Polycrystalline Silicon
Polycrystalline panels use silicon solidified from multiple crystal fragments rather than a single crystal. The grain boundaries between crystal fragments impede electron flow slightly, reducing efficiency to 15-17%. Polycrystalline cells have a distinctive blue, speckled appearance.
Polycrystalline panels were the budget standard for rooftop solar in the 2010s, but their share of the portable panel market has dropped below 10% as monocrystalline production costs fell. The efficiency gap of 4-8 percentage points means a polycrystalline panel needs to be 20-40% physically larger to produce the same wattage — a disadvantage for portable use.
Thin-Film (CIGS, Amorphous Silicon)
Thin-film panels deposit a thin layer of photovoltaic material onto a flexible substrate. CIGS (copper indium gallium selenide) and amorphous silicon are the most common thin-film technologies. Efficiency is lower — 10-15% for commercial thin-film — but the panels can be lightweight, flexible, and even semi-transparent.
Thin-film panels have a niche in portable power for situations where rigid panels cannot go: curved van roofs, irregular backpack surfaces, or applications where the panel must roll or fold to near-flat. The lower efficiency means you need more panel area, but for some form factors, flexibility is worth the compromise.
Connecting Solar Panels to Power Stations
The physical connection between a solar panel and a power station involves connectors, cables, and a charge controller. Getting this chain right determines whether you capture 100% of available energy or lose 20-40% to mismatches and inefficiency.
Connectors and Compatibility
Portable solar panels use several connector standards. The most common in 2026 are:
- MC4 connectors — the industry standard for rooftop and large portable panels. Locking, weatherproof, and rated for high current. Most power stations include an MC4-to-station adapter cable.
- Anderson Powerpole — common on Australian-designed and off-grid equipment. Color-coded (red/black), genderless, and easy to connect.
- XT60 — originally from the RC hobby world. Used by EcoFlow, BLUETTI, and several other brands. Compact and secure, but not as weatherproof as MC4.
- DC5521 — the barrel-style connector found on many budget panels and stations. Simple but not rated for high current, and the connection can work loose.
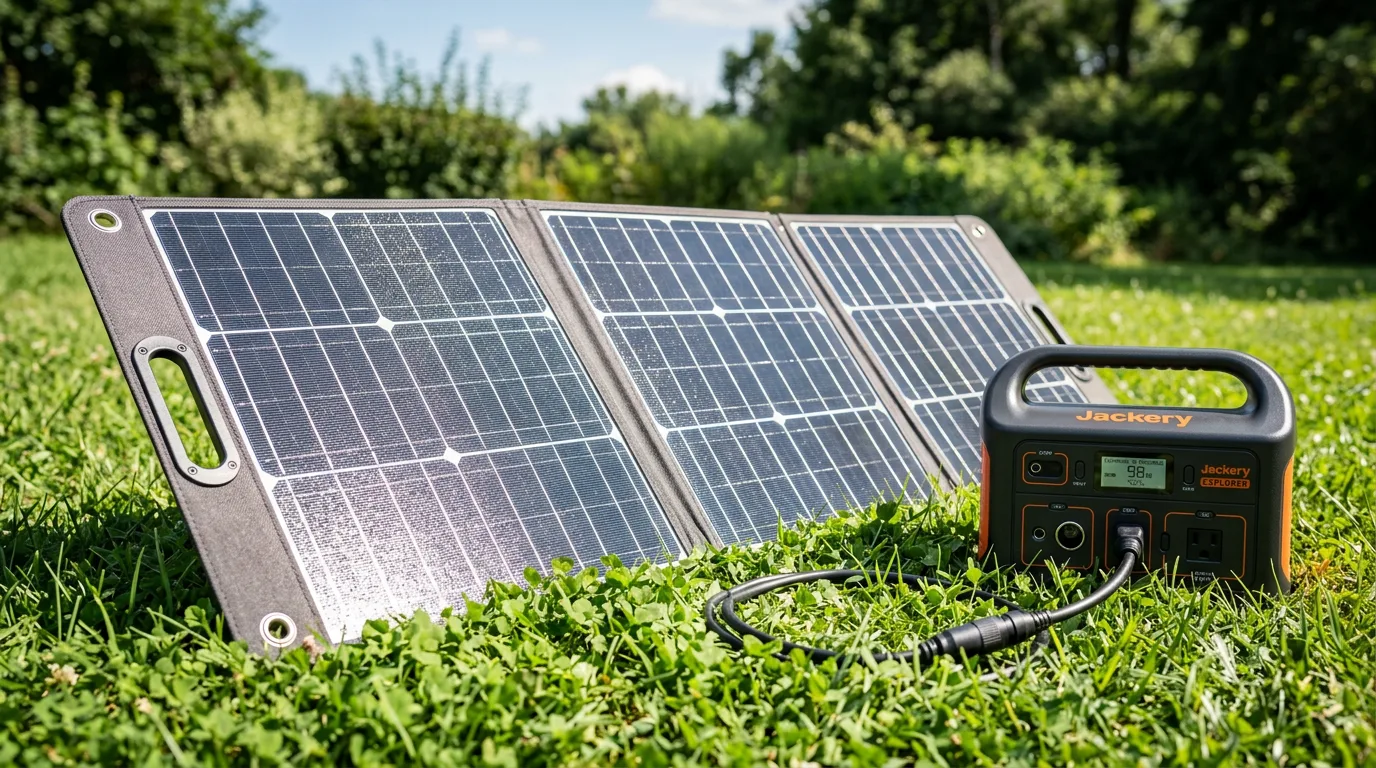
- Proprietary connectors — Jackery uses a DC8020 connector that limits compatibility with third-party panels. Some other brands have similar proprietary designs.
The Charge Controller's Role
Between the solar panel and the battery sits the charge controller — an electronic circuit that regulates the incoming solar power. The charge controller converts the panel's variable voltage and current into the specific voltage and current the battery needs. There are two types: PWM and MPPT (covered in depth in our MPPT vs PWM comparison).
Every modern power station has a charge controller built in. You do not need to buy one separately. But the type of controller — and its quality — directly affects how much of the panel's output actually reaches the battery. An MPPT controller captures 20-30% more energy than a PWM controller under most real-world conditions.
Maximizing Solar Charge Speed
The rated wattage on your solar panel is measured under Standard Test Conditions (STC): 1,000 W/m2 irradiance, 25°C cell temperature, and air mass 1.5. Real-world conditions rarely match STC, which is why actual output is typically 60-80% of the rating. Here is how to push closer to the theoretical maximum.
Angle Optimization
Panel output is proportional to the cosine of the angle between the sunlight and the panel surface. A panel pointed directly at the sun (0 degree offset) captures 100% of available light. Tilted 30 degrees off-axis, it captures about 87%. At 60 degrees off-axis, only 50%. This cosine effect is the single largest controllable factor in charge speed.
Adjust your panel orientation 2-3 times throughout the day to follow the sun's arc. Morning: face east at a steep tilt. Midday: face south (in the northern hemisphere) at a moderate tilt equal to your latitude. Afternoon: face west at a steep tilt. This simple tracking increases total daily energy harvest by 20-30% compared to a fixed south-facing position.
Temperature Effects
Solar cells generate more voltage in cool conditions and less in hot conditions. A monocrystalline panel loses roughly 0.3-0.4% of its rated output for every degree Celsius above 25°C (STC reference temperature). On a 40°C day, a 100W panel might produce only 94-96W — before accounting for any other losses.
Paradoxically, the best solar charging conditions are cool, clear, and bright — like a crisp fall morning at altitude. A hot summer afternoon with haze may produce less power per panel watt than a sunny March day.
Wire Length and Gauge
The cable between your panel and power station has resistance. Resistance causes voltage drop. Voltage drop wastes energy as heat. For most portable setups with cables under 20 feet, the losses are small — 1-3%. But with long cable runs (common when the panel is in sun and the station is in shade), use the thickest gauge cable practical. Every 0.5V of voltage drop at 5A represents 2.5W of wasted power.
Shade and Partial Shading Effects
Shade is the enemy of solar panels, but not in the way most people expect. A shadow covering 10% of a panel does not reduce output by 10%. Due to how solar cells are wired in series, a single shaded cell can bottleneck the entire string.
In a standard panel with 36 cells in series, each cell must pass the same current. If one cell is shaded, its current output drops. Because the cells are in series, the weakest cell limits the entire string. A single fully shaded cell can reduce panel output by 30-50%, not just the proportional area it covers.
Bypass diodes mitigate this somewhat. Most panels have 2-3 bypass diodes that allow current to route around a shaded section, losing only that section's contribution rather than bottlenecking the whole panel. Portable panels from reputable brands include bypass diodes; budget panels sometimes do not.
Sizing Your Solar Panel for Your Power Station
Panel sizing comes down to a simple ratio: how quickly do you need to recharge?
Start with your power station's battery capacity in watt-hours. Then decide how many hours of effective sun you expect per day. In most of the continental US during summer, you get 5-7 hours of "peak sun" — hours where solar irradiance is strong enough for effective charging. Winter drops to 3-4 peak sun hours.
Divide your station capacity by your desired recharge time (in peak sun hours), then multiply by 1.3 to account for real-world efficiency losses. That gives you the minimum panel wattage needed.
Example: A 1,000Wh station, desired full recharge in one day of summer sun (6 peak hours). Calculation: 1,000Wh / 6 hours x 1.3 = 217W. A 200W panel gets close; a 200W + 100W setup (if your station accepts 300W input) provides a comfortable margin.
But always check your power station's maximum solar input rating. This is the cap — going above it wastes panel wattage. A station that accepts 200W maximum will charge at 200W even if you connect 400W of panels.
Panel-to-Station Ratio Guidelines
- 0.1x to 0.2x ratio (panel watts / station Wh) — slow charge, 8-12+ hours in good sun. Acceptable for occasional use where time is not critical.
- 0.2x to 0.3x ratio — moderate charge, 5-8 hours in good sun. A good balance for most camping and off-grid scenarios.
- 0.3x to 0.5x ratio — fast charge, 3-5 hours in good sun. Ideal for daily use where you need to replenish the battery within a single day of sun.
- Above 0.5x ratio — diminishing returns unless your station accepts the full wattage. Check maximum solar input before investing in excess panel capacity.
Series vs Parallel Panel Connections
When using multiple panels, how you wire them — series or parallel — changes the electrical characteristics of the combined output.
Series connection (positive of panel 1 to negative of panel 2): voltages add, current stays the same. Two 18V/5.5A panels in series produce 36V at 5.5A (198W). Use series when your power station has MPPT and accepts higher voltages. MPPT controllers convert excess voltage into additional current efficiently.
Parallel connection (positive to positive, negative to negative): currents add, voltage stays the same. Two 18V/5.5A panels in parallel produce 18V at 11A (198W). Use parallel when you need to keep voltage low (for PWM controllers or stations with narrow voltage input ranges) or when panels experience different shading — in parallel, a shaded panel only reduces its own contribution, not the entire array.
Real-World Solar Charging Expectations
Here is what honest solar charging looks like in practice, stripped of manufacturer optimism:
- A 100W panel produces 60-80W for most of the day in direct sun. Expect 400-550Wh of total energy over a full summer day (6-7 peak sun hours).
- Morning and late afternoon output drops to 30-50% of peak. The productive charging window is roughly 9 AM to 4 PM in summer.
- A passing cloud can drop output by 50% instantly. Output recovers equally fast when the cloud passes.
- Dirty panels lose 5-10% efficiency. A quick wipe with a damp cloth before deploying can make a measurable difference.
- Panels on the ground in a field outperform panels leaning against a car. Ground placement allows optimal angle; leaning against vertical surfaces locks the panel at a steep angle that misses midday sun.
Solar charging is not plug-and-forget. Active management — adjusting angle twice a day, keeping the panel clean, avoiding shade, and starting early — can double the total energy captured compared to a panel set up carelessly and left alone.
Solar Panel FAQ
How long does it take to charge a power station with a solar panel?
Charge time depends on three factors: panel wattage, power station capacity, and real-world conditions. A 100W panel charging a 500Wh station under ideal conditions would take roughly 6-7 hours. In practice, expect 7-10 hours because real solar output averages 60-80% of rated wattage due to angle, clouds, and heat. Multiply station capacity by 1.3 (for efficiency losses), then divide by your panel rated wattage times 0.7 for a realistic estimate.
Can I use any solar panel with any power station?
Not always. You need to match three things: the connector type (Anderson, XT60, DC5521, MC4, or proprietary), the voltage range (most stations accept 12-48V input), and the maximum input wattage (exceeding this will not damage the station but the excess is wasted). Some brands like Jackery use proprietary connectors that limit third-party panel compatibility without an adapter.
Do solar panels work on cloudy days?
Yes, but at reduced output. Light overcast clouds reduce panel output to roughly 50-70% of rated wattage. Heavy cloud cover drops output to 10-30%. Rain and dense fog can reduce output to under 10%. Solar panels respond to light intensity, not heat — so a cool, clear day actually produces more power than a hot, hazy day.
Can I charge a power station with solar panels while using it?
Most modern power stations support pass-through charging, which means you can draw power from the outlets while simultaneously charging from solar. The net charge rate is reduced by whatever load you are running. If your panel provides 100W and your devices draw 60W, the battery receives roughly 40W of net charging power. Check your station manual — some budget units recommend against sustained pass-through use.
Is it better to use one large panel or multiple smaller panels?
Multiple smaller panels offer flexibility in placement and angle optimization, but they require cables and sometimes a parallel adapter. A single large panel is simpler to deploy. The key constraint is your power station maximum solar input — if your station accepts 200W max, two 100W panels in parallel deliver the same charge speed as one 200W panel. Above the station limit, extra panel wattage is wasted.
Should I get a monocrystalline or polycrystalline solar panel?
Monocrystalline panels are the standard for portable solar in 2026. They offer 20-23% efficiency versus 15-17% for polycrystalline, meaning more watts per square foot of panel area. The cost difference has narrowed to under 10%. Polycrystalline panels still work fine, but monocrystalline gives you more power in a smaller, lighter package — which matters when you are carrying the panel to a campsite.
What angle should I point my solar panel?
Point the panel directly at the sun — perpendicular to the sunlight — for maximum output. As a general rule, tilt the panel at an angle equal to your latitude. In the continental US, that means roughly 30-45 degrees from horizontal. Adjusting the panel 2-3 times throughout the day (morning, midday, afternoon) to track the sun can increase total daily harvest by 20-30% compared to a fixed position.
Ready to Buy? Start Here
Based on this guide, our #1 recommendation:
Jackery Solar Generator 1000 v2 Best bundled solar panel experience for learning how solar charging works Read Full Review →